
[React] React-Redux
1. React-Redux 란?
✔️ Redux 는 예측 가능한 상태 컨테이너로 자바스크립트 기반의
프레임 워크에서 모두 쓸 수 있지만, (Angular, Vue, React 등) 리액트에서는
React-Redux 라이브러리를 사용해야 state 와 props 가 연동된다.
React-Redux 는 React 용 동식 Redux UI 바인딩 라이브러리로 사용하려면 React-Redux 와 Redux 모두 설치해야 한다.
✔️ react-redux는
React와 Redux를 쉽게 연동할 수 있도록 도와주는 공식 라이브러리이다. React 애플리케이션에서 Redux를 사용하려면,
Redux는 자바스크립트 애플리케이션에서 상태 관리를 위한 라이브러리로, 애플리케이션의 전체 상태를 하나의 스토어(store)에서 관리한다. 이를 통해 상태 관리를 일관성 있게 처리할 수 있으며, 상태 변화를 추적하고 디버깅하기도 용이하다.
1-1. 사용순서
리덕스를 사용하는 애플리케이션의 실행 순서
1️⃣ 애플리케이션을 시작하면 index.js가 실행되어 리덕스 스토어를 생성하고
provider를 사용하여 애플리케이션을 연결한다.
2️⃣ index.js 에서 App.jsx 컴포넌트를 루트 요소에 렌더링 한다.
3️⃣ App.jsx에서 애플리케이션의 구조와 로직을 정의하고
리덕스 스토어와 상호 작용할 수 있도록 설정한다.
4️⃣ 리덕스 액션들이 발생하면, 각 리듀서에서 정의된 로직에 따라 상태가 업데이트 되고,
변경된 상태가 해당하는 컴포넌트로 전달 된다.
이 과정에서 react-redux의 connect함수나 useSelector와 useDispatch 훅을 사용하여
컴포넌트와 스토어 사이의 상태 및 액션을 연결한다.
1-2. 제공 기능
react-redux는 주로 다음과 같은 기능을 제공합니다:
✔️ <Provider>: 애플리케이션의 최상단에 위치하여,
Redux 스토어를 React 애플리케이션에 전달한다.
이를 통해 하위 컴포넌트들이 Redux 스토어에 접근할 수 있다.
✔️ connect(): React 컴포넌트와 Redux 스토어를 연결하는 함수이다.
이 함수를 사용하여 컴포넌트에 필요한 상태 값과 액션 생성자(action creator)를 주입한다.
connect()는 1️⃣mapStateToProps와 2️⃣mapDispatchToProps라는 두 개의 인자를 받아,
각각 컴포넌트에 스토어의 상태와 액션 생성자를 연결한다.
useSelector와 useDispatch: React-Redux v7.1.0부터 도입된 훅입니다. 함수형 컴포넌트에서 connect() 대신 사용할 수 있으며, 각각 스토어의 상태를 가져오고 액션을 디스패치하는 기능을 제공한다.
1-3. 사용시 장점
react-redux를사용하면 React 애플리케이션과 Redux 스토어를 손쉽게 연결할 수 있으며, 컴포넌트 간 상태 공유와 전역 상태 관리가 용이해진다.
1️⃣react-redux와 2️⃣useReducer는 React에서
상태 관리를 처리하는 두 가지 다른 방법이다. 두 기술의 주요 차이점은 사용 목적과 관리되는 상태의 범위이다.
react-redux:
- Redux 라이브러리를 사용하여 전역 상태 관리를 수행한다. 애플리케이션 전체에서 공유되는 상태를 관리하는데 사용된다. 일관된 상태 관리 및 변경 로직을 제공하며, 큰 규모의 애플리케이션에서 특히 유용하다. 애플리케이션 전체에서 상태 변화를 추적하고, 여러 컴포넌트에서 상태를 공유할 수 있다.
-
react-redux는 connect() 또는 훅(useSelector, useDispatch)을
사용하여 컴포넌트와 스토어를 연결한다.
useReducer:
- React의 내장 훅 중 하나로, 로컬 상태 관리를 수행한다. 컴포넌트 내에서 상태 관리가 필요할 때 사용되며, 주로 복잡한 상태 업데이트 로직이 있는 경우에 사용된다.
- 상태 변경 로직을 리듀서 함수로 분리하여 관리한다. 전역 상태를 관리하기 위한 목적으로 설계되지 않았기 때문에, 애플리케이션 규모가 커지면 상태 관리가 복잡해질 수 있다.
1-4. 다운 명령어
npm istall--save redux-devtools-extenstion

npm redux react-redux
사용 에디터 터미널 또는 cdm에 입력 및 다운 가능
2. React-Redux 를 사용하는 이유
2-1. 전역 상태 관리
기존 리액트에서는 여러 컴포넌트에 걸쳐 있는 상태를 변화시키거나 기준이 되는 컴포넌트와 멀리 떨어진 컴포넌트 간의 데이터를 주고 받기 어려웠다.
React-Redux 는 이런 문제를 해결하기 위해 중앙에서 Store 를 통해 전역으로 상태를 관리해 여러 컴포넌트를 거치지 않고 바로 상태 값을 받을 수 있다.
2-2. props drilling(프로퍼티 내리꽂기)
하위 컴포넌트가 깊어지고 전달하는 컴포넌트가 많아질 수록
props 를 추적하거나 유지보수하기 어려워진다.
React-Redux 는 이런 props drilling 을 막고 멀리 떨어진 컴포넌트도 중앙 데이터 저장소, Store 에서 직접 전달할 수 있다.
2-3. Redux 의 여러 기능들을 React 의 API 에 맞도록 감싸 놓은 UI Binding 라이브러리
createStore combineReducer API 는 리덕스에서 제공하며 리액트 리덕스는 리덕스의 기능을 리액트에서 같이 사용할 수 있도록 Provider 컴포넌트, useSelector, useDispatch 같은 리액트 전용 훅을 제공한다.
2-4. Redux 와 React-Redux API 예시
2-4-1. Redux API
**createStore - store 를 생성한다.**
// store.js

import { createStore } from 'redux';
import { rootReducer } from 'app.js';

const store = createStore(rootReducer);

export default store;
**combineReducer - 여러 개의 slice를 결합하여 하나의 root reducer 를 만든다.**
// reducer.js

import { createStore, combineReducers } from 'redux';

const counterInitialState = { counter: 0 };

export const counter = (state = counterInitialState, action) => {
  switch (action.type) {
    case 'INCREMENT':
      return { ...state, counter: state.counter + 1 };
    case 'DECREMENT':
      return { ...state, counter: state.counter - 1 };
    default:
      return state;
  }
};

const cartInitialState = [];

export const cart = (state = cartInitialState, action) => {
  switch (action.type) {
    case 'ADD_ITEM':
      return [...state, action.payload];
    case 'DELETE_ITEM':
      return state.filter((product) => product.id !== action.payload.id);
    default:
      return state;
  }
};

const rootReducer = combineReducers({ counter, cart });
const store = createStore(rootReducer);

export default store;
2-4-2. React-Redux API
**Provider - react app 전체에 제공할 store를 주입하는 컴포넌트 이다.**
// index.js

import React from 'react';
import ReactDOM from 'react-dom';
import { Provider } from 'react-redux';
import store from './store/index';
import App from './App';

ReactDOM.render(
  <Provider store={store}>
    <App />
  </Provider>,
  document.getElementById('root')
);
**useSelector - store의 state에 접근하는 hook 이다. useState의 state 처럼 활용한다.**
// Counter.js

import React from 'react';
import { useSelector } from 'react-redux';

const Counter = () => {
  const count = useSelector((state) => state.counter);
  return <div>{count}</div>;
};

export default Counter;
**useDispatch - action을 reducer로 보내는 역할이다. useState의 setState 처럼 쓴다.**
// Count.js

import React from 'react';
import { useSelector, useDispatch } from 'react-redux';

const Count = () => {
  const dispatch = useDispatch();
  const count = useSelector((state) => state.counter);

 const increase = () => {
    dispatch({ type: 'INCREASE' });
  };

  const decrease = () => {
    dispatch({ type: 'DECREASE' });
  };
  return (
    <div>
      <h1>{count}</h1>
      <button onClick={increase}>increment</button>
      <button onClick={decrease}>decrement</button>
    </div>
  );
};

export default Count;
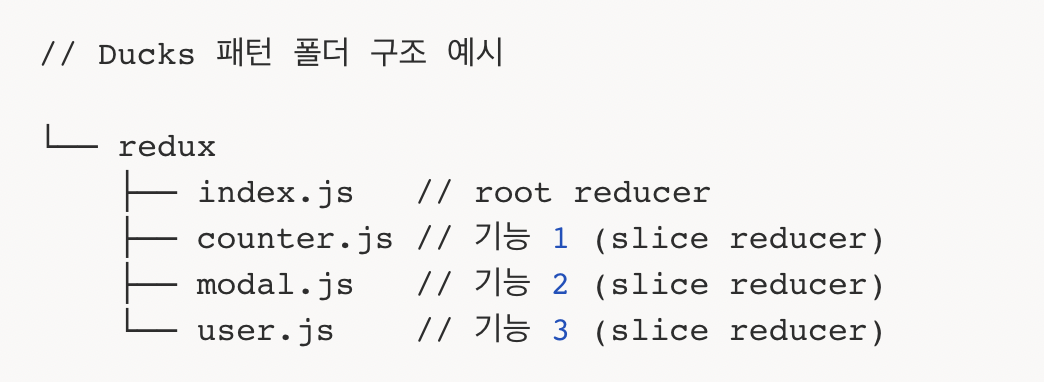
3. Ducks 패턴
3-1. Ducks 패턴이란?
Ducks 패턴은 redux 구성 요소인
Action Type, Action, Reducer 셋을 하나의 파일 안에서 관리하는 패턴이다.
Ducks 패턴은 구조 중심으로 파일을 나누는 것이 아니라
기능별로 나누는 방식으로 하나의 파일안에서 관리하는 방법이다.
수정사항을 하나의 파일에서만 수정하면 되므로 직관적으로 코드를 작성할 수 있다.
3-2. Ducks 패턴 규칙
Reducer 파일안에 Action type 과 Action Creator 함수를 함께 넣어서 관리하고,
이를 Module(모듈)이라고 한다. 이 패턴(모듈)의 규칙은 아래와 같다.
MUST export default a function called reducer()
반드시 reducer 함수를 export default 해야 한다.
MUST export its action creators as functions
반드시 action creator 함수를 export 해야 한다.
MUST have action types in the form npm-module-or-app/reducer/ACTION_TYPE
반드시 action types 의 네이밍 규칙을
npm-module-or-app/reducer/ACTION_TYPE 이런식으로 해야 한다.
만약 NPM 모듈을 만드는 게 아니라면 reducer/ACTION_TYPE 형식으로 만들어도 된다.
리듀서에서 액션 이름이 중첩되지 않도록 접두사를 단다.
MAY export its action types as UPPER_SNAKE_CASE, if an external reducer needs to listen for them, or if it is a published reusable library
필수는 아니지만 외부 리듀서가 모듈 내 액션 타입을 바라보거나,
모듈 재사용이 가능한 라이브러리로 쓰인다면 액션 타입을
UPPER_SNAKE_CASE 형태로 export 하면 된다.
// Ducks 패턴 규칙 예시
// module/counter.js

// Actions
const INCREASE = 'counter/INCREASE';
const DECREASE = 'counter/DECREASE';

// Action Creators
export function increase() {
  return { type: INCREASE };
}

export function decrease() {
  return { type: DECREASE };
}

// Reducer
export default function counterReducer(state = {}, action = {}) {
  switch (action.type) {
    case INCREASE:
      return {...state, state.counter + 1}
    case DECREASE:
      return {...state, state.counter - 1}
    default:
      return state;
  }
}
4. React-Redux 예제
4-1. store 생성과 Provider 컴포넌트로 전역에 store 주입 예시
// src/index.js

import React from 'react';
import ReactDOM from 'react-dom/client';
import Router from './Router';
import { Provider } from 'react-redux';
import { createStore } from 'redux';
import rootReducer from './redux';

const store = createStore(rootReducer);
const root = ReactDOM.createRoot(document.getElementById('root'));

root.render(
  <Provider store={store}>
    <Router />
  </Provider>
);
4-2. reducer 와 actionCreator, action type (duck 패턴 적용된 Module 파일)
// src/module/counter.js

// Action Type
const INCREASE = 'counter/INCREASE';
const DECREASE = 'counter/DECREASE';

// Action Creator & Action
export const increase = () => ({ type: INCREASE });
export const decrease = () => ({ type: DECREASE });

const counterInitialState = { count: 0 };

// Reducer
const counter = (state = counterInitialState, action) => {
  switch (action.type) {
    case INCREASE:
      return { count: state.count + 1 };
    case DECREASE:
      return { count: state.count - 1 };
    default:
      return state;
  }
};

export default counter;
// src/module/cart.js

// Action Type
const ADD_ITEM = 'cart/ADD_ITEM';
const DELETE_ITEM = 'cart/DELETE_ITEM';

// Action Creator & Action
export const addItem = (item) => ({ type: ADD_ITEM, payload: item });
export const deleteItem = (id) => ({ type: DELETE_ITEM, payload: id });

const cartInitialState = [{ id: 1, productName: 'nacho', price: 2000 }];

// Reducer
const cart = (state = cartInitialState, action) => {
  switch (action.type) {
    case ADD_ITEM:
      return [...state, action.payload];
    case DELETE_ITEM:
      return state.filter((product) => product.id !== action.payload);
    default:
      return state;
  }
};

export default cart;
4-3. 각각의 reducer 를 합치는 rootReducer 예시
// src/redux/index.js

import { combineReducers } from 'redux';
import counter from '../module/counterReducer';
import cart from '../module/cartReducer';

const rootReducer = combineReducers({ counter, cart });

export default rootReducer;
4-4. 렌더링 할 view 예시
// src/View/Product.js

import React from 'react';
import { useDispatch, useSelector } from 'react-redux';
import {
  increase,
  decrease,
  addItem,
  deleteItem,
} from '../module/counterReducer';

const Product = () => {
  const counter = useSelector((state) => state.counter.count);
  const cart = useSelector((state) => state.cart);
  const dispatch = useDispatch();

  const onIncrease = () => {
    dispatch(increase());
  };

  const onDecrease = () => {
    dispatch(decrease());
  };

  const cartAddItems = () => {
    dispatch(addItem({ id: 2, productName: 'chilly', price: 3000 }));
  };

  const cartDeleteItems = () => {
    dispatch(deleteItem(2));
  };

  return (
    <div className="App">
      <h1>Hello Redux</h1>
      <p>{counter}</p>
      <button onClick={onIncrease}>+</button>
      <button onClick={onDecrease}>-</button>
      {cart.map((item) => {
        return <p key={item.id}>{item.productName}</p>;
      })}

      <button onClick={cartAddItems}>아이템 추가</button>
      <button onClick={cartDeleteItems}>아이템 삭제</button>
    </div>
  );
};

export default Product;
Leave a comment